Fall means clean up, especially for your lawn and garden. Follow this simple checklist to ensure no task is forgotten.
Trees
- Purchase and plant trees and shrubs. For proper instructions check out our Plant a Tree or Plant a Shrub article.
- Harvest all fruit trees and remove any rotten fruit from the ground.
- Apply a layer of mulch around new trees to protect the soil from the cold.
- Stop watering trees at the beginning of autumn until all the leaves fall off, then water as normal until the ground freezes.
- Fertilize if your tree/shrub has reduced branch growth, dull color, abnormal timing, and/or wilting.
- Remove anything damaged or diseased.
- Prune any branches that may break due to heavy snow or that may get in the way.
Perennials
- Cut plant stems 1-2 inches from the ground.
- Remove any brown stems or spent flowers.
- Place all dead foliage and stems into a compost pile.
- Place all diseased foliage and stems into a burn pile or the trash.
- Apply a fresh layer of mulch around the base of the plant.
- Cut back watering, only water during dry conditions.
- Apply a protective net around plants to prevent critter damage.
Garden
- Remove vegetable plants and their vines.
- Work non-diseased plants back into the garden soil or place in a compost pile.
- Till up or rake the soil to loosen it up and break apart leftover plants.
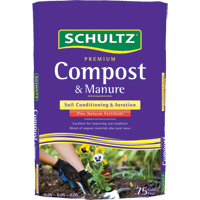
- Amend soil with organic material such as Schultz Compost.
- Plant cover crops after harvest. Use our Cover Crop article as a guide.
- Remove weeds naturally. For instructions, reference our Natural Weed Remedies article.
- The area you planted root crops can be mulched instead of dug up.
- Harvest squash and pumpkins when ripe. Check out our Fall Harvest article for simple steps.
- Map out your current garden layout for next year’s crop rotation.
Container Plants
Container plants can generally survive winter climates when rated 2 grades lower than the zone you are in. For example, if you are located in zone 5 then zone 3 plants will be safe in the winter climate. If your plants do not qualify to be left outside you can either bring them indoors, or get rid of them completely. Depending on your situation, follow the steps to either Container Plants Left Outdoors, Container Plants Brought Indoors, or Container Plants Removed.
Container Plants Left Outdoors:
- Upgrade to a larger pot.
- Add new and healthy soil to the container plants, more soil = better root protection.
- Move containers to a soil or mulch area that is shielded from the wind.
- Place all outdoor container plants next to each other, grouping container plants helps moderate a good soil temperature.
- Apply mulch around the base of the pot, bury the container in soil, or wrap the pot in burlap or geotextile blankets.
- Remove any damaged plants or stems, the healthier the plant the better it will withstand winter weather.
- Water your plants during the winter, but only as needed. Tilt the pot as you water in order to prevent freezing at the base of the pot.
- Apply a protective net around the plant to protect from winter critters.
Container Plants Brought Indoors:
- Place the plant in a warm and dry area that receives plenty of natural sunlight.
- Place plants outdoors during the day if desired. Make sure there is minimal wind, bright sunlight, and no snow fall.
- Always bring container plants indoors at night.
- Water only as needed.
- Keep the soil fresh and the container clean.
- Remove dead and diseased foliage as it forms.
Container Plants Removed:
- Place dead plants in a compost pile.
- Place diseased or insect infested plants in a burn pile or in the trash.
- Remove all soil from the pot.
- Wash and dry the container well.
- Place all terra cotta pots in a warm and dry place such as a basement; the cold temperature and wet climate will cause them to crack.

FEATURED PRODUCTS: